Showing posts with label how-to. Show all posts

Tuesday, March 12, 2013

It's not easy being green....especially when it's snowing outside


I have been chomping at the bit to start planting my spring garden, but up until this weekend the weather here had not been cooperating.  (We're just getting over an unseasonably cold spell here in South Carolina and I know a lot of you have gotten some snow that you were not expecting.)  So, to tide myself over until spring, I've been working on a little indoor gardening. 

Succulents!!!

These little beauties are easy to find (at your local garden or hardware store for around $3.00 a piece) and are extremely hard to kill (which is good if you forget to water them like I do).  They are very low-maintenance, requiring only a bit of sun and infrequent watering.

This is what succulents should look like.  The plants are usually compact with smooth, swollen leaves.

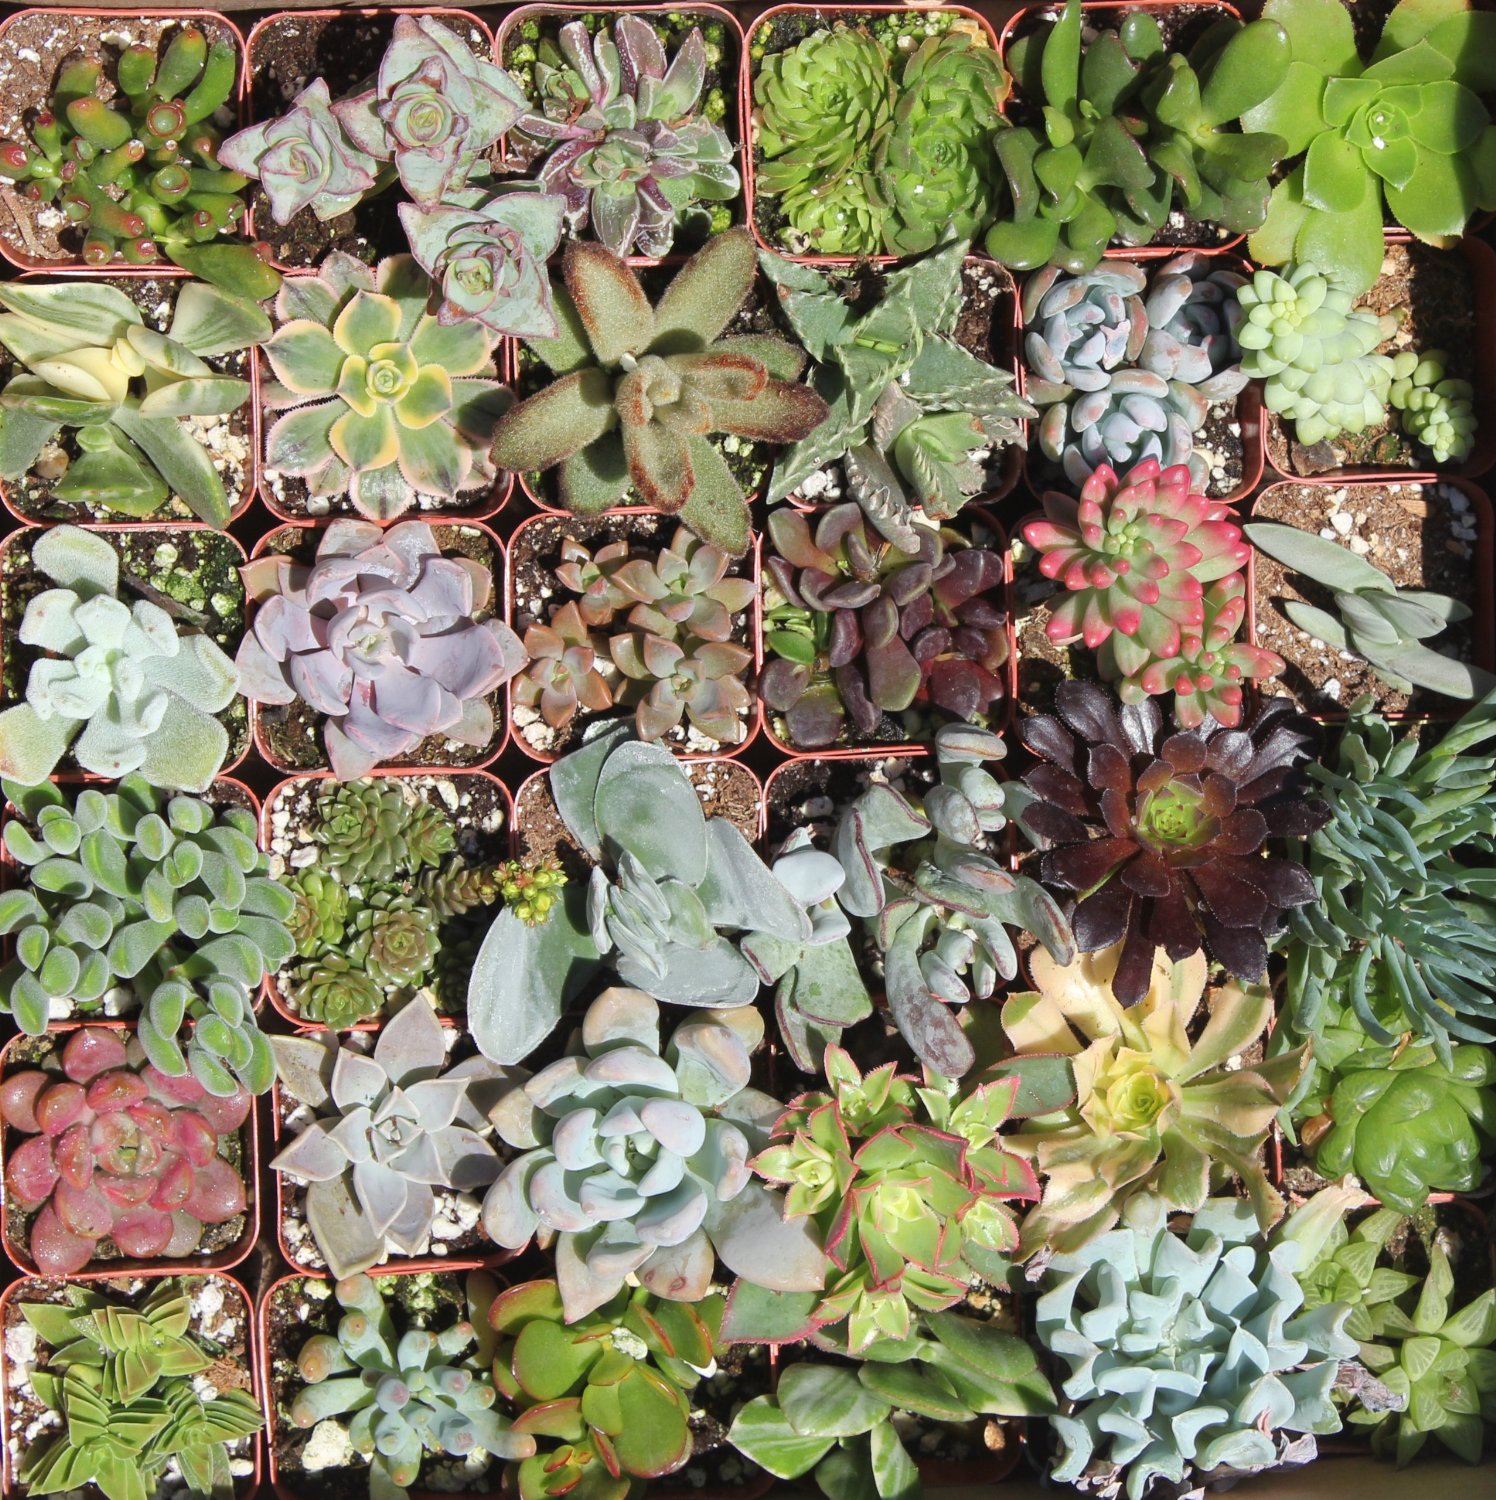
Aren't they pretty?  This a great deal if you want a large assortment to start your own succulent garden.

And this is what your plant will look like if you forget to put it in a sunny window.  Plants will extend from the dirt and reach up towards the sun if they do not get enough light, especially in winter.
This guy sat in a shady corner of my kitchen for weeks.  Poor little guy!

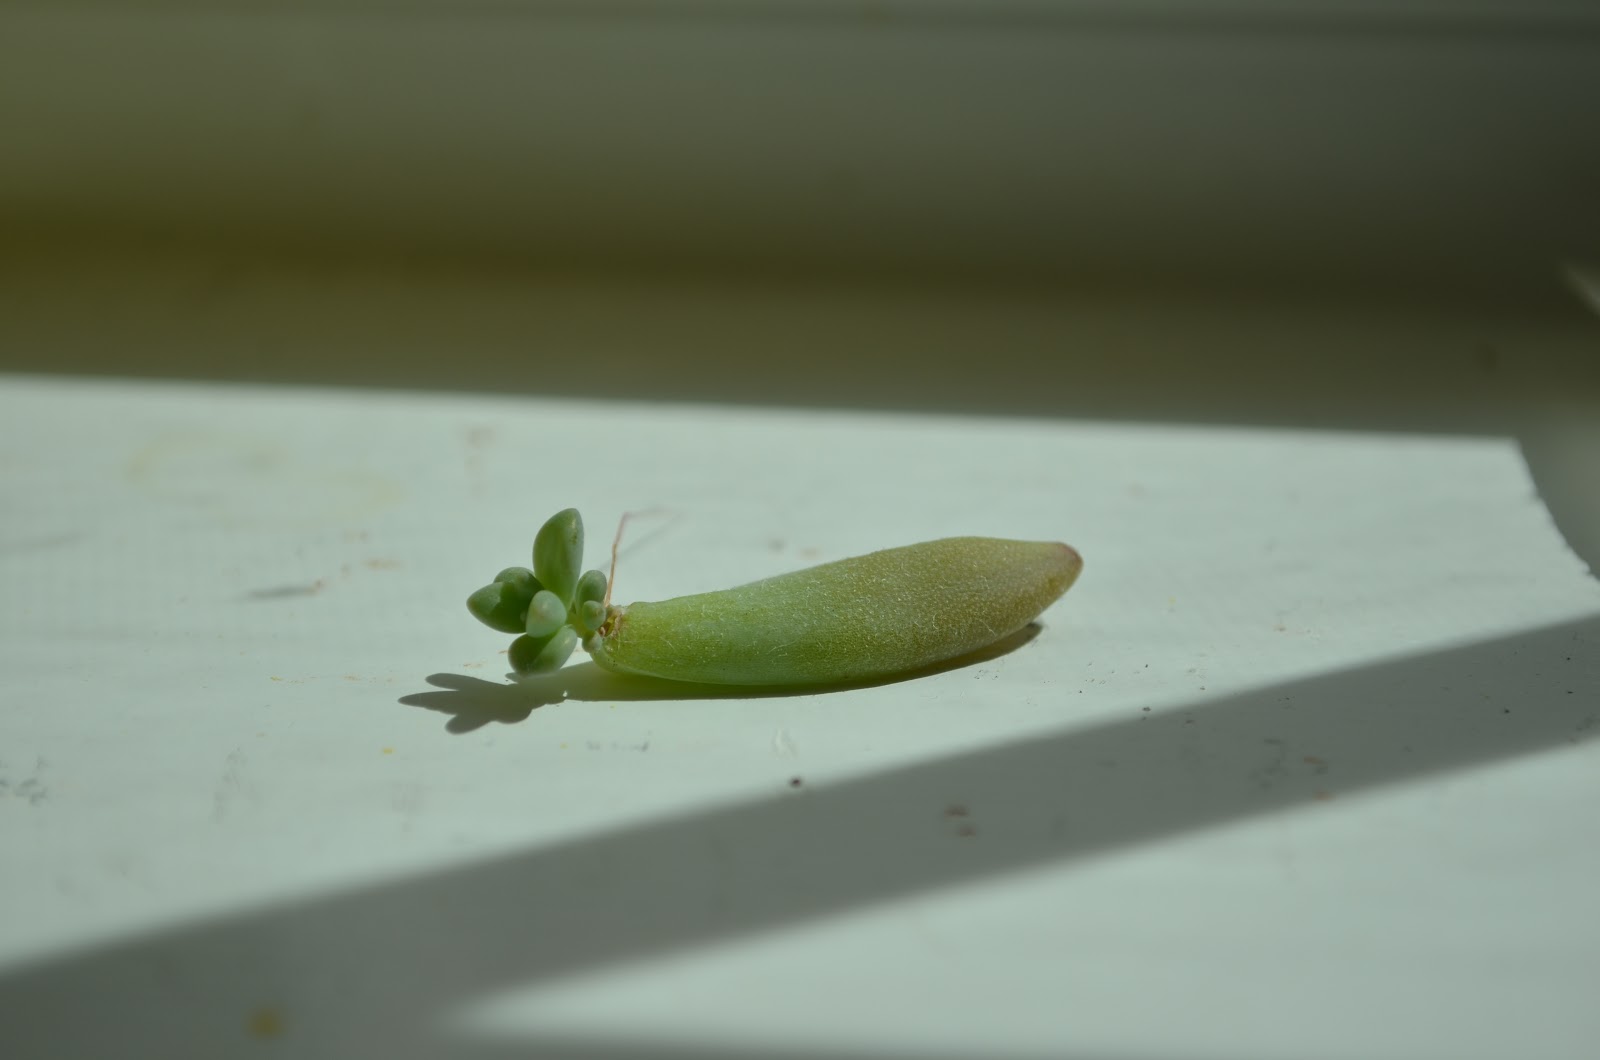
But not to worry, you have not ruined your succulents if they send off shoots.  In fact, this is the perfect opportunity to start new succulent plants.


Just cut off a leaf at the base of the stalk.


The research I've done on these little guys says you should let them rest 3 days in a sunny spot for a scab to form over the end of the leaf.  I let this batch set out for 2 weeks, until they sprouted roots.  Although, I have also had luck propagating them by putting them directly from cutting into the ground.


Some even started to form new plants.


Micah found this single leaf on the front porch from last spring, where I used to keep my succulents.  A leaf must have fallen off and decided it wanted to live.  I'm telling you, these suckers are resilient!
Then, just press the leaf into a patch of unoccupied soil.  Soak with water, and let it sit in a sunny spot.  In a couple of days a new, compact set of leaves will form on the end of the leaf and eventually blossom into a new, perfect succulent plant.

These plants are approximately 3 months old.  They started as 2 single leaves, and sent off a stalk, that eventually produced a flower.


I planted my succulents in vintage tin molds and a copper bowl I found while thrifting, but any container will do.  I hope this inspires you to start a succulent garden of your own!!!

Tuesday, February 19, 2013

A Week of Presidents - How to Make a Presidential Flour Sack Towel

I hope everyone who came to Lamb Celebration Day at Swan Bay Folk Art Center had a good time with our lambs!  Thank you for making the day so special for us!  If you missed it, or just want to visit with our lambs again, we will offering another day to celebrate with our sheep on Sunday, February 24th, from 2:00-4:00 PM.  

While y'all were braving the New Jersey winter, my little family had the awesome opportunity last weekend to go to Walt Disney World for a couple of days.  Ever since Jesse found out we were going, he's been asking if we could go to the Hall of Presidents.

(Photo of The Hall of Presidents found here.)
This was taken as we were waiting for the show to start.  My little monkeys were already getting restless. 
Jesse is six years-old, with an extremely short attention span, so I thought he would hate it.  I couldn't have been more wrong!  Jesse LOVED it!  It turns out that my funny, energetic boy loves history.

I hadn't been to see the presidents since I was very little.  It's one that we usually skip over in the interest of more "entertaining" attractions.  Watching it as an adult, I found my non-political heart stirred in pride for my country.  So, when we got home, I busted out a crafty tribute to Jesse's two favorite presidents - George Washington and Abraham Lincoln.


The finished towel
Flour sack towels are thin, and dry quickly after drying your dishes or hands.  Here's what you need to make a presidential flour sack towel, too!


The Supplies:
White flour sack towel (I bought mine in bulk here.)
Freezer paper
Presidential silhouette pattern
Exacto knife
Cutting mat
Black screen printing paint
Paint brush
Iron
Plain white paper (such as printer paper)
Red and blue embroidery floss and needle

The Process:
If you have never used freezer paper for printing before, you are missing out!  It's a simple process that usually produces awesome results.  First, prepare the flour sack towel by washing, drying, and ironing it.

Then, print out the presidential silhouettes from the file at the bottom of this post. 

Place squares of freezer paper (which are slightly larger than the silhouettes) shiny-side down on top of the printed presidents.  Trace the presidents on pieces of freezer paper using a light box to help you see the shapes, or hold papers up to a sunny window.
Using your Exacto knife and cutting mat, cut around your traced lines, starting with the most delicate parts of the face first.

Using a very hot iron, place stencil silhouettes shiny side down where you'd like them and press into place.  (I folded my towel in thirds, and placed the freezer paper on the middle third.)

Place a piece of plain paper under the fabric towel and paint in the stencil using the fabric paint.

Paint slightly over the edges of the stencil to ensure that the edges are covered.

When the paint is dry (I usually let mine set overnight.)  peel off the stencils.  Heat set using the paint manufacturer's instructions.
Tie an overhand knot in the red thread and thread it through your needle.  

Starting in the back of the fabric, insert your needle and pull the thread through to the front. 

Now do a simple running stitch all the way around the perimeter of the silhouette.


When you get to the end, tie several knots to keep the thread from coming undone.

The finished knot.  Continue in the same way with the blue thread, following the line around the red running stitches.

The finished stitches
Happy crafting!!!

(((Amy)))

Tuesday, February 5, 2013

How-To Tuesdays - Felted Valentine Hearts


I love Valentine's Day, and getting the chance to decorate this testosterone-heavy house with pink and purple hearts makes me so happy!  I have been on quite the heart-making kick, that I'd thought I'd share a bit on how to make them with you!  (You can purchase a kit here if you're so inclined to join me.)  Even you've never needle-felted before, this is an easy project that a beginner can do.  

Okay...first off....
Measure out 10 inches of natural roving.
Roll roving into a circular coil.
Secure the end to form a circle by tacking it down to the with your felting needle.
Felt using a up-and-down motion all over the circle.  Flip the circle and felt again.  Keep flipping and felting until the circle reaches your desired stiffness.
Make an indentation at the the top of the heart using your felting needle.  Felt several times .
Pinch the opposite side of the "heart" to form a triangular shape.
Turn heart on its side and felt the side straight.  Use a single need or needle tool.
Shape with your fingers if you need to.  Continue felting....
until your heart reaches your desired shape.
Place your dyed wool on top of your heart, and felt into place. 
Keep covering your heart with dyed roving until....
the whole heart is covered.
Now that your heart is done, you can decide how you want to embellish it!

To make a white outline, take your white wool yarn and place on the outer 1/4 inch edge of the heart.
Starting with the edge, and keeping your fingers out of the way, felt the yarn into place.
Continue around the entire edge, felting as you go.
The finished outline.
Now, let's add a flower!
Make a circle the size of a silver dollar with the color you want for the petals.  Use your felting needle to felt the circle on both sides, flipping until you reach a tightly felted circle.
Hold the circle in one hand as you carefully stick the needle into the edge of the flower.  This will form the indentation between two petals.

Continue around the circle by pinching a "petal" and making an indentation next to it.    Five indentations, arranged equidistantly around the circle will make 5 petals.

Place your finished flower in the center of the heart.  Felt into place.


Roll up a small bit of white wool and place in the center of the flower.
Felt the white into place.
Take a piece of twine, ribbon, or yarn and thread on a sharp needle.  
Pull the twine through... 
tie an overhand knot in the ends of the twine...
step back, and admire your heart.

These hearts can be hung up on a tree, strung on a mantle, or tucked carefully into the hands of your little loves for a sweet Valentine's Day gift.  You can also purchase hearts in our shop.  Happy crafting!!

(((Amy)))