Showing posts with label recipes. Show all posts

Friday, March 1, 2013

Friday for the kids...In like a lion.....

Every day (when it's not raining or too cold) we head to the playground for some after school energy release.  The boys run around and play with their friends, inventing new games like Star Wars tag,  ninja Spiderman, or chasing witches to destroy them with water-shooting magic wands.  The parents try to catch up, having abbreviated conversations between chasing the littles (who are trying to escape the mulched area, desperately trying to reach the enticing parking lot) or assisting a kid up the rock wall.  We often bring snacks to share.  Usually I grab a bag of goldfish before running out the door, or if I'm really motivated, I'll bake a batch of chocolate chip cookies.  But, since we're celebrating March this week, I decided to bring a snack that the kids could make and eat together.  Here is our recipe for Cheesy lions.


Ingredients:
* Babybel cheese for each kid
* Pretzel sticks
* Raisins
* Carrots cut into triangles (see directions below)
* Food coloring marker (I had orange and black.)


Before you go to the the playground, wash, peel, and slice a carrot like so.
Trim the rounded edges off to make a triangle.  You need one triangle per lion.
When I got to the playground, all of the kids washed their hands, gathered around the picnic table, and received a plate.

Unwrap the Babybel cheese and remove the red wax layer as well.

Press carrot "nose" into the center of the cheese.

Press pretzel sticks into the sides all around the cheese to form the mane.  Some kids broke the pretzels in half to make a shorter mane, others decided to leave the pretzels whole.

Jesse, showing off his lion so far.

Use a pretzel stick to make holes for the eyes.  Press in raisins into the prepared "sockets."  Use food coloring markers to make the mouth and whiskers.
The finished products....  The kids really enjoyed making and eating their own little lions!


Happy first day of March!!!!

(((Amy)))

Wednesday, February 20, 2013

Presidential Inspiration

The week of Presidential celebration continues with some inspiration for education, entertainment, and snacks.  First off...

Something to learn:
I came to the realization today that I don't know all that much about our nation's Presidents.  I can't list half of their names let alone when they served, what they stood for, or what they did.  Well, this set wouldn't get me all the way there, but it would be a start:
Uncle Goose Presidential Blocks
This beautiful set of wooden blocks contains 45 blocks: one for each President and one with the Oath of Office.  Each Presidential block contains the President's face, name, years in office, when and where he was born and died, and what party he ran with.  The blocks fit together to depict the American flag.  Although the set is a little pricey ($87.95 on Amazon), I can assure you that this is a top quality product.  My mother-in-law got the Uncle Goose classic alphabet blocks set for Judah for Christmas.  They are beautifully crafted and are sure to be an heirloom for generations to come.  They even offer replacement blocks on their website in case you lose one.  And they are made in the USA.

Something to Watch:
Here are two of my favorite Presidential movies, conveniently offered in a two-pack on Amazon.
The American President was written by Aaron Sorkin, the same man who wrote the West Wing series.  It follows the President (Micheal Douglas) through his re-election campaign, which gets messy when he begins a relationship with environmental lobbyist, Annette Bening.  Its excellent supporting cast (including Martin Sheen and Michael J. Fox) and witty banter make it a highly entertaining experience.

In Dave, a look-alike (Kevin Kline) is hired to take over for the President when he gets sick.  The movie shows how he turns out to be a better President than the real one and falls for the first lady (Sigourney Weaver).  It's a feel-good story about a genuinely good guy doing the right thing and getting the girl.  You can't go wrong with that.

Something to Do:
Did you think making little edible houses was an exclusively Christmasy activity?  Think again.  Martha Stewart offers us these adorable pretzel log cabins in celebration of Lincoln's birthday.
You can find complete instructions here.

Something to Eat:
If pretzels and peanut butter aren't your jam, maybe a little taste of George Washington's cherry tree is more up your alley.  This is a recipe that has become a Giberson girl standard.  It's one of my favorite desserts to make and to eat.  Unfortunately, I don't have a picture, so you'll just have to use your imagination.  They're a shortbread-like cookie bar-ish type treat with sweet cherry pie filling centers.  Hard to explain because I've never had anything else quite like them, but they are oh so good!

Cherry Tarts
1 cup crisco
1 1/2 cups sugar
4 eggs
1 tsp vanilla
2 cups flour
1 can cherry pie filling*
confectioner's sugar
*They've been filling these cans with less cherries and more goop in recent years, so you may want to get 2 cans to make sure you have enough cherries.
  1. Preheat oven to 350 degrees.  Grease a 9 x 13 pan.
  2. Combine crisco and sugar.  Add 4 eggs, one at a time.  Add vanilla and flour.
  3. Pour batter into pan.  Score batter into 24 squares.  Drop 3 cherries onto the center of each square.
  4. Bake until a toothpick comes out clean (about 30-40 minutes).  Dust with confectioner's sugar, cut, and serve.
The cherries settle into the tarts forming a little heart in the center of each.  So not only are they delicious; they are also pretty adorable.


I hope these little inspirations spark your own Presidential traditions.  How have you been celebrating our nation's Presidents?

Tuesday, January 22, 2013

How-To Tuesdays - Making a Warm Cup

Have you seen these mugs decorated with Sharpies on Pinterest?  They are so cute and easy, and I had to try it out.  I drew up a cute little design on a mug, and popped my mug in the oven, just to find that the marker came right off in the dishwasher.  (((humph.)))

So I headed to the craft store, where a very nice kid swore that these are the right markers to use on ceramics....

Then I took my boys to a nearby thrift store and let them pick out a mug of their own.  (Yes.  I was very brave for taking my two rambunctious boys to a store with breakable objects!)  We found some plain ones we liked and spent a whopping $.25 a piece.  You can use any oven-safe, ceramic mug.

I washed and dried the mugs thoroughly, then let my little artists got to town.

Look at that concentration. 
Gotta stick your tongue out if you want to get it just right.  (The boy wears a costume for everything!)

And then a miracle happened.  They went off to play nicely together and I got a whole 20 minutes to MYSELF!  I told you....a MIRACLE!!!!

Idea book, blank "canvas" and a warm cup of tea...perfect!
I found this book at a thrift store a couple of years ago with Victorian stencil images.  (I had great plans of embroidering a bunch of these designs, but I haven't gotten around to it yet.)  Anyway, I thought it would make the perfect design on a mug.

Lots of pretty inspiration!
I sketched a design on the mug with pencil...(Can you see it?)
then filled it in with the black paint pen.
Now, the directions on the markers said that you had to heat-set the paint if you used it on fabric, but said nothing about ceramics.  So, after drying, I tested the paint, and it chipped right off.  (((double humph!)))  So, I attempted to heat set it.  (Disclaimer....the pens say that they're non toxic, but I opened a window when I put the mugs in the oven, just in case.)

I put the mugs in a cool oven and turn it on to 350 degrees.  Once the temperature reached 350, I let the mugs cook for 30 minutes, then shut off the oven and let the oven return to room temperature (a couple of hours). And another miracle....the paint set!  (I am still going to hand-wash my little works of art, just in case.)


Give it a try!  You too can have yourself a pretty new mug to send to your mug swap partner... or keep it for yourself and try this dangerously easy recipe for a molten chocolate brownie cake.  You'd think that since you're cooking it in the microwave it would be gross, but seriously...  Seriously.  It's amazing.  You will love it!

Ingredients:
2 Tablespoons butter
4 Tablespoons flour
4 Tablespoons sugar
2 Tablespoons unsweetened cocoa powder 
1 teaspoon of vanilla extract
2 Tablespoons water
a pinch of Kosher salt (I use Kosher salt for almost everything)
Whipped cream or vanilla ice cream (optional)

Put the butter in your mug and microwave for 20-30 seconds, or until the butter is completely melted.  Add the flour, sugar, cocoa powder, water, vanilla extract and salt to your mug and whisk together with a fork.  Place in the microwave and "bake" it on high for 1 minute 30 seconds, or until the center is set.
Attempt to resist taking a bite right when it comes out of the microwave.  It will seriously burn your face off (and it would be almost worth it).  Let it cool for at least 5 minutes, add a dollup of whipped cream or scoop of ice cream if you wish, and enjoy!


If you haven't joined our mug swap, please check out the details here.

Tuesday, January 15, 2013

How-To Tuesday: How to Bundle Up Pigs & Dogs

I seem to always forget about this recipe until the beginning of February when everyone is in Superbowl mode, but as this is my favorite "bundled up" recipe, I thought it would be a good time to shed some light on this overlooked delicious treat.  Pigs in a blanket!

All it takes is a package of refrigerated crescent rolls and some "little smokies" and you'll be the crowned "Queen of the Kitchen." 
Cut dough to size. 
Place on greased baking sheet seam side down. 

And follow directions on the package of how long to bake.  (My rolls said 12-15 min at 350 degrees.) 

But, if pigs in a blanket are too small to be satisfying for you, let me please present you with the highly sophisticated, more grown-up version.  We have an Amish market about 45 minutes away from us in Williamstown, NJ.  It has amazing spices, produce, baked goods, candy, meat, cheeses, and ice cream....but the best thing they have (which we never leave without one or two in tow) is The Pretzel Dog.

I remember having a conversation with my friend, Jen, about wanting to learn how to make them.  She said to me, "I think that is both a good....and very bad idea."  Good because they are delicious.  Bad because they are SO delicious.

I have to admit, I was a little apprehensive when I read the recipe and it said to get out my dough hook attachment to my mixer.  (Do I even have one of those?? *dig*dig*dig* Oh, hey, I do!)  Today, my friends, I am going to conquer my fear of the hook for the very worthy cause of pretzel dough.  Care to join me on my adventure?

Arg!  Time for some scurvy baking!  (sorry...a little pirate humor.)

This recipe is adapted from The Brown Eyed Baker, whose original recipe was adapted from Alton Brown.


Yield: 8 pretzel dogs
Prep Time: 1 hour 30 minutes
Cook Time: 12 to 14 minutes
Total Time: 1 hour 45 minutes

Ingredients:

1½ cups warm (110 to 115 degrees F) water
1 tablespoon granulated sugar
2 teaspoons kosher salt
1 package (2¼ teaspoons) active dry yeast
4½ cups all-purpose flour
¼ cup unsalted butter, melted
4 slices American cheese
Vegetable oil, for pan
10 cups water
2/3 cup baking soda
2 tablespoons unsalted butter, melted
Kosher salt, for sprinkling

Directions:

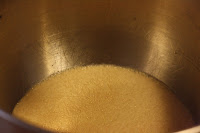
1. Combine the water, sugar and salt in the bowl of a stand mixer and sprinkle the yeast on top. Allow to sit for 5 minutes or until the mixture begins to foam.
water, sugar, salt, and yeast sprinkled on top
After 5 minutes, the mixture will foam

2. Add the flour and butter and, using the dough hook attachment, mix on low speed until well combined. Change to medium speed and knead until the dough is smooth and pulls away from the side of the bowl, approximately 4 to 5 minutes. Remove the dough from the bowl and place it in a clean, oiled bowl. Cover with plastic wrap and place in a warm area for about 1 hour, or until the dough has doubled in size.
what the dough will look like before it pulls away from the bowl

After an hour of rising.  The microwave seemed like a good "warm place"


3. Preheat the oven to 450 degrees F. Line 2 baking sheets with parchment paper and lightly brush with the vegetable oil. Set aside.

4. Bring the 10 cups of water and the baking soda to a rolling boil in an 8-quart pot.


5. In the meantime, cut American cheese into strips and place on top of hot dogs. Turn the dough out onto a slightly oiled work surface and divide into 8 equal pieces. Roll out each piece of dough into a rope that's about 18-inches long. Starting at one end, wrap the dough around the hot dog, pinching each end together so that it's sealed. Place onto the parchment-lined half sheet pan and repeat with the remaining dough and hot dogs.

The recipe said to roll, I just stretched it and it worked just fine. 


I had a little extra, so I made a few plain pretzel twists. 


6. Place the pretzel dogs into the boiling water two at a time and boil for 30 seconds. Remove them from the water using a large flat slotted spatula. Return the boiled pretzel dogs to the half sheet pan, brush the tops with melted butter and sprinkle with the coarse kosher salt. Bake until dark golden brown in color, approximately 12 to 14 minutes. Transfer to a cooling rack for at least 5 minutes before serving.
Boil for 30 seconds

Brush with butter

Sprinkle with salt

Hello, beauties!!!  (I baked mine for 12 minutes...I probably could have done another minute.  

In the end, my dough to meat ratio could have been a little less, and my kosher salt could have been courser, but all in all, I was happy with how they came out.  It was totally worth digging out and conquering my fear of the dough hook.  I'll definitely be making these again, maybe some different versions of soft pretzels would be fun to try....like cheese, or cinnamon sugar maybe? 

And yes, Jen...you were right.  This was both a very good, and very bad idea.  

In the comments...what other foods would be good try to "bundle up" in crescent rolls or pretzel dough?  My husband and I were brainstorming at dinner last night.  We'd love to hear your thoughts!     

Wednesday, January 2, 2013

Beginning Traditions

     They say that everyone is three generations away from being forgotten.  I would like to make sure that that does not happen by building traditions that will hopefully last long after we're gone.  I never met my Grandmother but as her story goes, she was a Russian peasant who was married at 14 and had her first child at 15.  Shortly after the birth of their first child, Monya's husband was shot.  Monya pulled the bullet out with her teeth and wrapped his wounds with her petty coat.  They decided that they were not safe in Russia so Monya's husband went to America to start a new life for the young couple.  When the time was right, my Grandmother walked from Russia to Belgium with her infant son at night to board a boat to America.  How people even found each other in America is beyond my comprehension, but they did reunite and eventually had three more children.  Her husband had a bad heart, and to help support the family, my Grandmother opened a Russian tea house in Princeton.  Shortly after, her husband died, and she later married her egg delivery man (my Grandfather) with whom she had a daughter (my mother).
     All that said, I have often wished that I had even one of Monya's recipes as I have been told that she was a very generous, charming women who was also an amazing cook and baker.
     About 5 years ago I decided that I did not want to be one of those forgotten generations and that our family traditions should be documented.  It took me two years to complete it.  Anyone who knows me will tell you that it is very difficult for me to sit still.   So to sit at a computer and type recipes and quirky family happenings over the past many holidays is not easy for me.  Each recipe was put into plastic pages.   I made an index by holiday and put all the pages in a binder for easy use in the kitchen.


     On December 21, 2009, I put the last pages into 4 copies of our Traditions Cookbook and wrapped them with Christmas paper, ready ahead of time (which never happens) for Christmas present opening by my three daughters (and me).  On December 22 I was rushed to the hospital with a stroke.  I remember laying in the hospital bed thinking that I was so glad that I wrote this book, so it will be ok for me to go.  But God had other plans.  I did not die, (or I would not be sharing this with you right now).  I had no residual effects from the stroke, and now I can keep adding to our book and building more family traditions with my grandchildren and more generations to come.


Here is one of the recipes that  I would like to share with all of you that I have been making for my last forty one New Year's Eves:


Chocolate Fondue 
6 oz. Unsweetened Chocolate
1 1/2 cups sugar
1 cup light cream
1/2 cup buttter
1/8 tsp salt
Fruit for dipping: bananas, apples pears, mandarin orangers, peaches, blueberries, strawberries
You can also use pound cake or marshmallows

Melt all ingredients together in a pot, stirring to prevent sticking.  Transfer to a fondue pot to keep warm.  Give each person their own fork or skewer for stabbing the fruit and dipping into the warm chocolate.

P.S.  Don't forget to leave a comment on our first post for your chance to win an awesome gift basket from us!